![Pro4all Logo-1.png]](https://support.pro4all.nl/hs-fs/hubfs/Pro4all%20Logo-1.png?height=50&name=Pro4all%20Logo-1.png)
Users & Groups
1. Click Users & Groups in the Speedbuttons under Tools.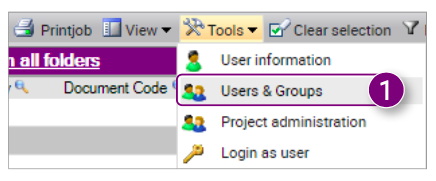
The Users & Groups window is opened with an overview of all users and groups within the current domain.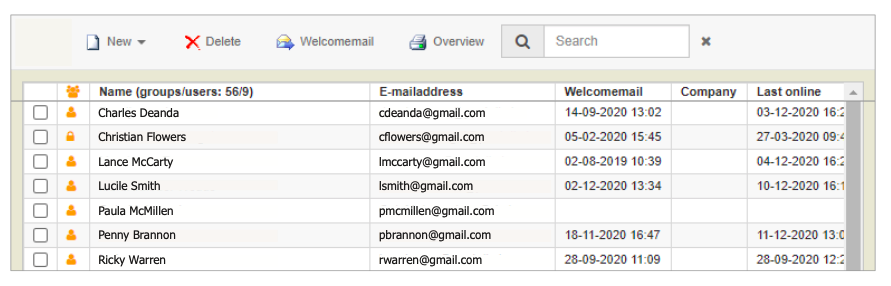 Adding a new user
1. Click New and click User at the top of the window.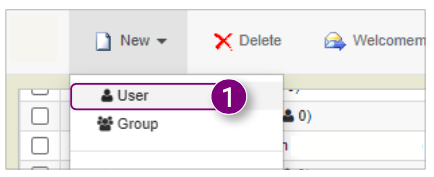
A new window will open in which you can enter the details of the new user.
2. Enter the Username.
3. Enter the Display name.
4. Enter the First name.
5. Enter the Last name.
6. Enter the Middle name.
7. Enter the E-mail address.
8. Select a Company or click the plus icon to add a new company.
9. Select a Snagstream role.
10. Select the desired Language.
11. Select on which folders the user needs to be informed.
12. Select if a Welcome Email will be sent to the new user.
13. Select if you want to Deactivate the user.
14. Click More settings to select additional settings.
15. Click Privileges at the top of the window. 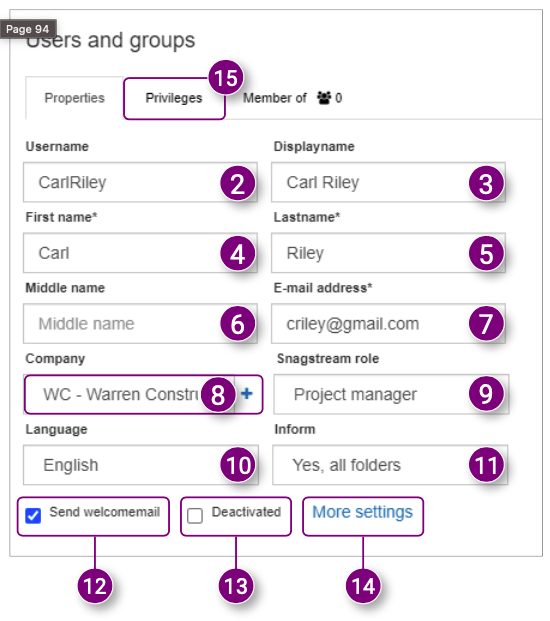
16. Select which Privileges the new user will have.
17. Click Member of at the top of the window. 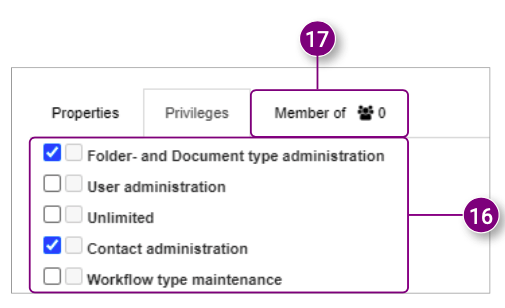
18. Select which groups the new user will be a Member of.
19. Click Save in the bottom right corner of the window. 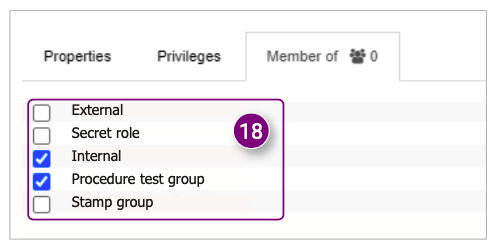

Editing users
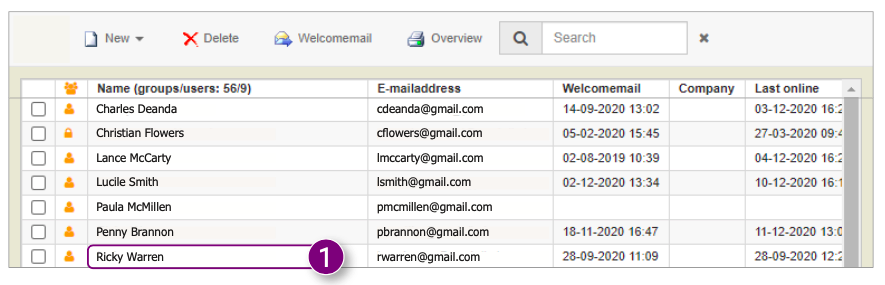
1. Click the user you want to edit in the overview in the Users & Groups window.
 A new window is opened in which you can edit the user's details.
2. Edit the Properties, Privileges and Groups of the user. 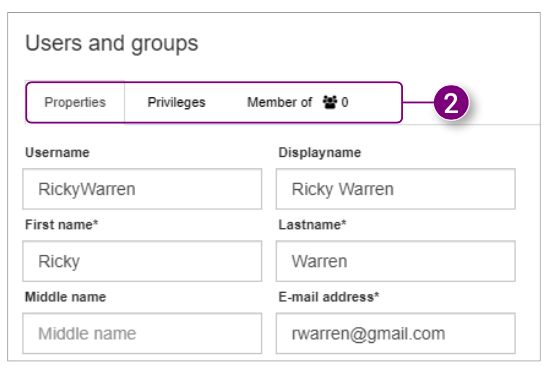
3. Click Save in the bottom right corner of the window after making the desired changes.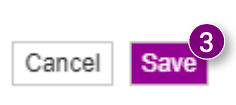
Deleting users
1. Select the user(s) you want to delete in the overview in the Users & Groups window.
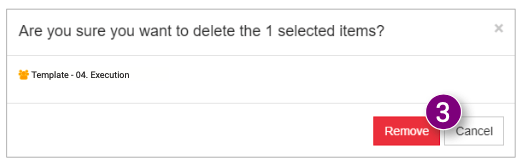
2. Click Delete at the top of the window. 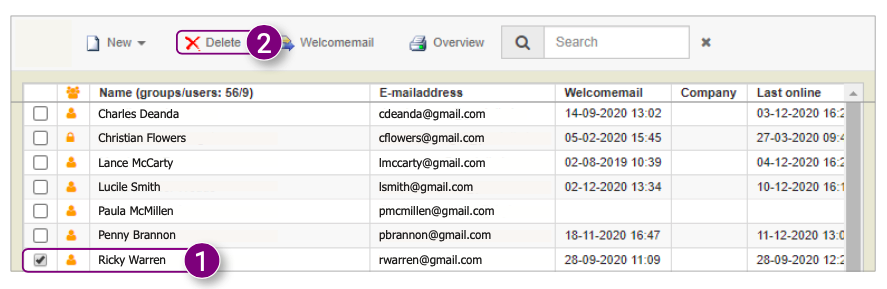 A message will be displayed asking if you are sure you want to delete the selected item(s).
3. Click Delete in the message.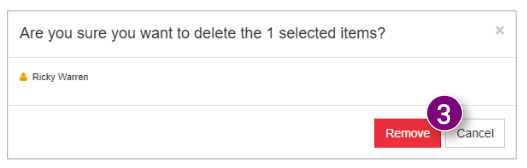
Adding a new group
1. Click New and Group at the top of the Users & Groups window.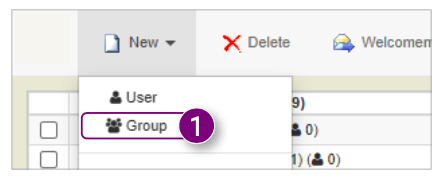
A new window will open in which you can enter the details of the new group.
2. Select the Role.
3. Enter the Worknumber.
4. Select the Project phase.
5. Enter the Company.
6. Select if you want to Deactivate the group.
7. Click Privileges at the top of the window. 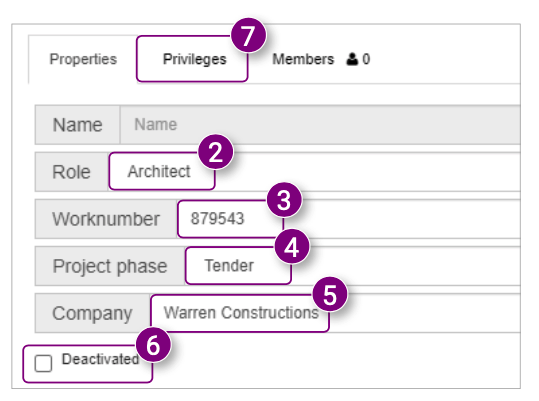
8. Select which Privileges the new group will have.
9. Click Member of at the top of the window.
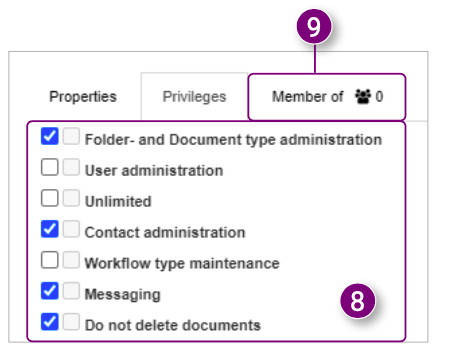
10. Select which users will be a Member of the new group.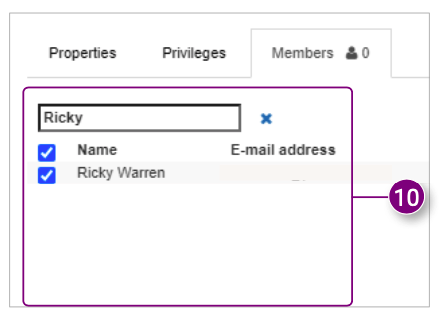
11. Click Save in the bottom right corner of the window.
Editing groups
1. Click on the group you want to edit in the overview In the Users & Groups window.A new window will open in which you can edit the details of the group.
2. Edit the Properties, Privileges and Members of the group.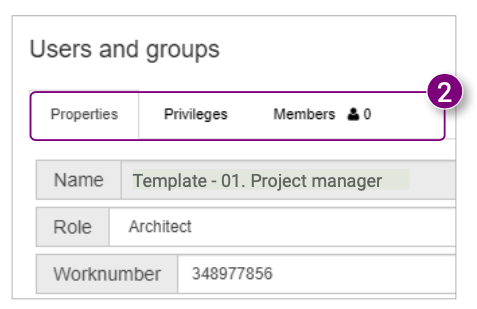
3. Click Save in the bottom right corner of the window after making all the desired changes.
Deleting groups
1. Select the group(s) you want to delete in the overview in the Users & Groups window.
2. Click Delete at the top of the window. 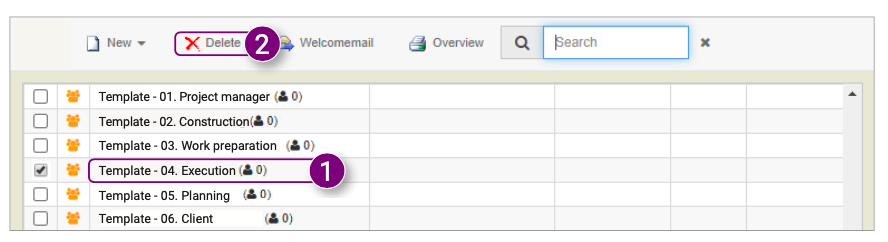
A message will be displayed asking if you are sure you want to delete the selected item(s).
3. Click Delete in the message.
1. Click New and Company at the top of the Users & Groups window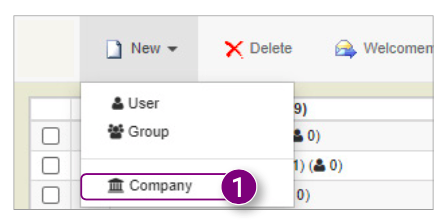
A new window will open in which you can enter the details of the new company. 2. Enter a Name.
3. Enter a Company code.
4. Click Add in the bottom right corner of the window.
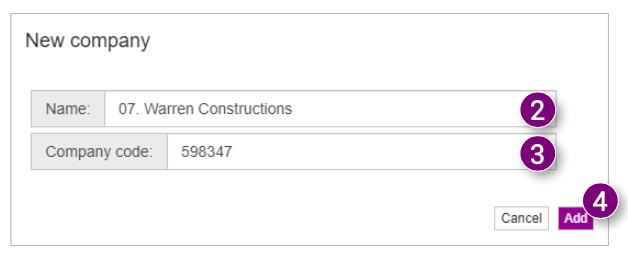
A message will appear stating the company has been added.
Sending users a welcome email
In the Users & Groups window you can resend users a welcome email.
1. Select the user(s) you want to resend the welcome email to.
2. Click Welcomemail at the top of the window.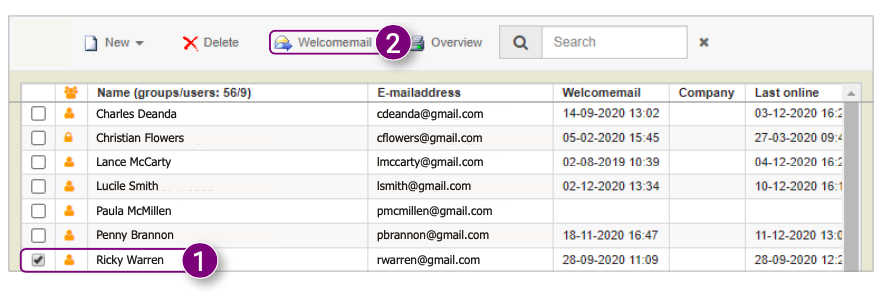 A notification will appear asking if you are sure you want to send the selected users a welcome email.
3. Enter an Optional message that will be included in the welcome email.
4. Click Ok in the notification. 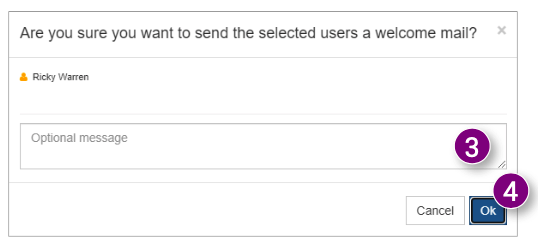
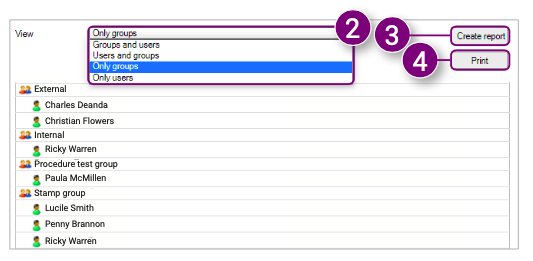
Creating an overview
1. Click Overview at the top of the Users & Groups window.

A window is displayed showing all users and groups (including added members). 2. Select the desired View for the overview.
3. Click Create report to refresh the overview.
4. Click Print to print the current overview.
A window appears in which you can edit the print settings. 